HarmonyOS實戰 | 貪吃蛇游戲 | JS全注釋
前言
本人之前是Java后端開發,對于前端開發一知半解。但是對于官方資料中的這個貪吃蛇項目十分感興趣。打算做一遍流程。雖然資料中也含有開發流程,但是不全,而且沒有注釋。所以決定自己寫完之后,把每個步驟總結出來并寫上注釋。屬于二次創作吧!
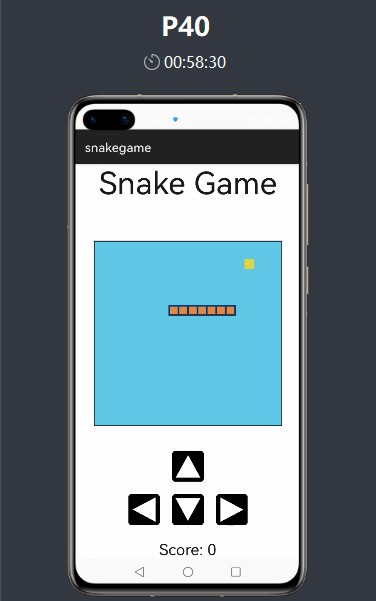
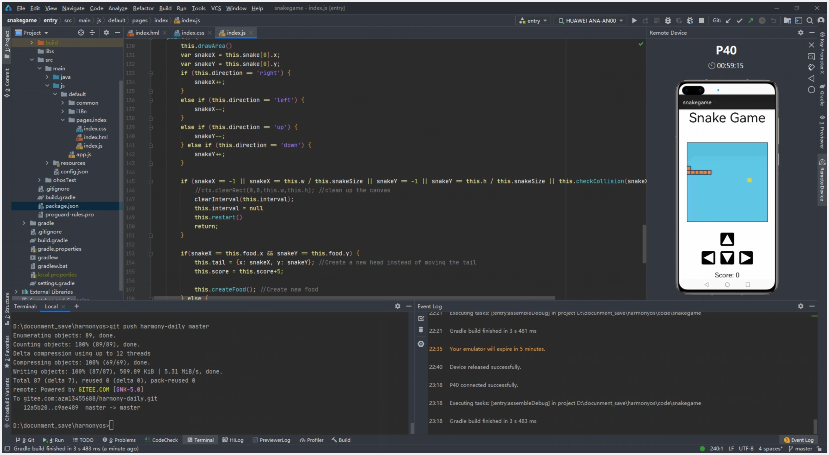
開發完成的程序界面如下所示。抄一遍代碼運行,也不會超過2h。適合剛學習鴻蒙的開發者~如果你喜歡,不妨收藏一下(≧∇≦)ノ
正文
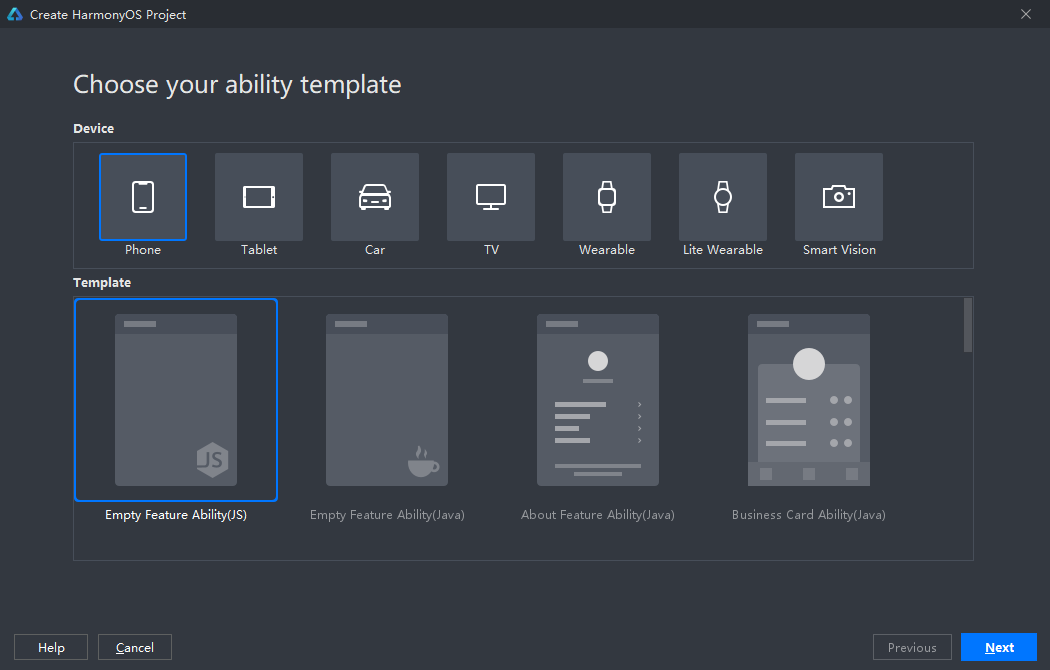
一、創建項目
1. 選擇JS模板
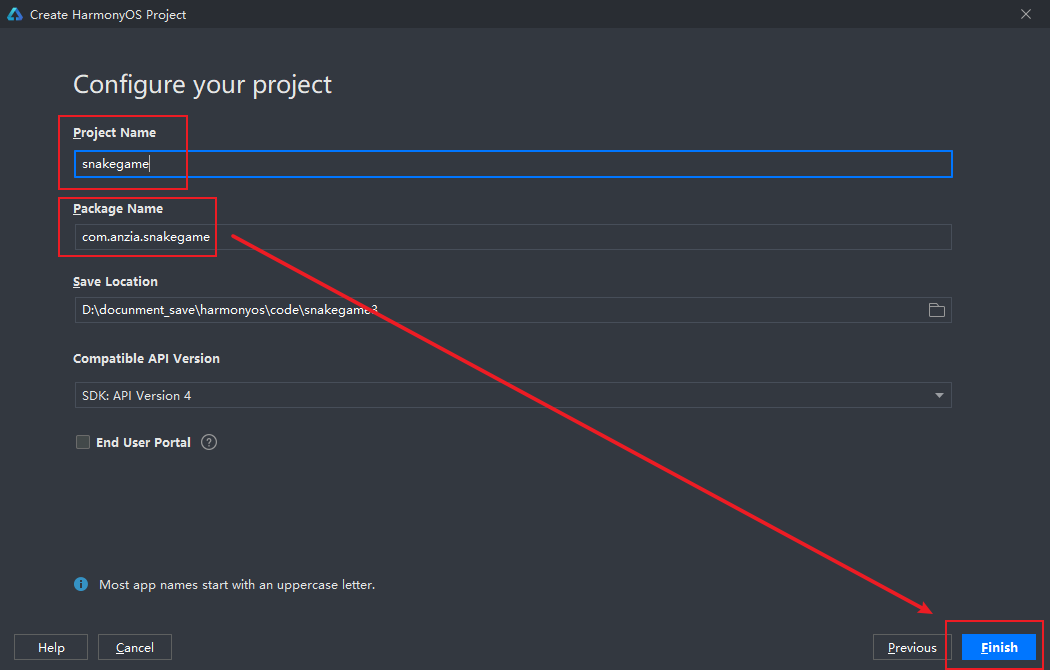
2. 定義自己的項目名和包名,然后點擊finsh
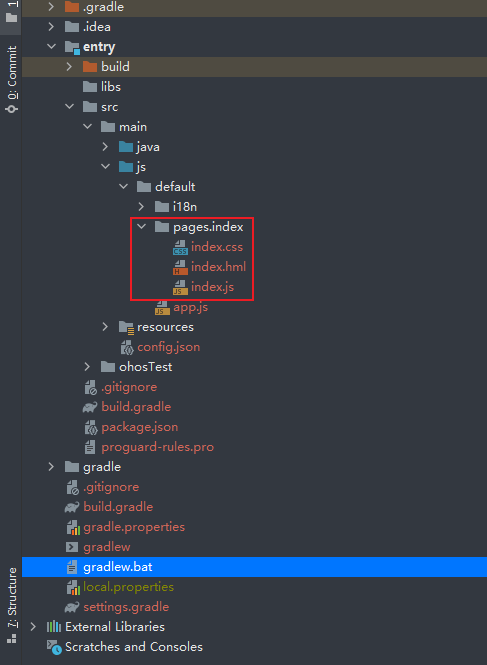
3. 創建完畢,生成的目錄結構如下:
由于項目比較簡單,所以就只需要在紅框中的位置編寫代碼。這是由項目默認生成的噢!
二、編寫代碼
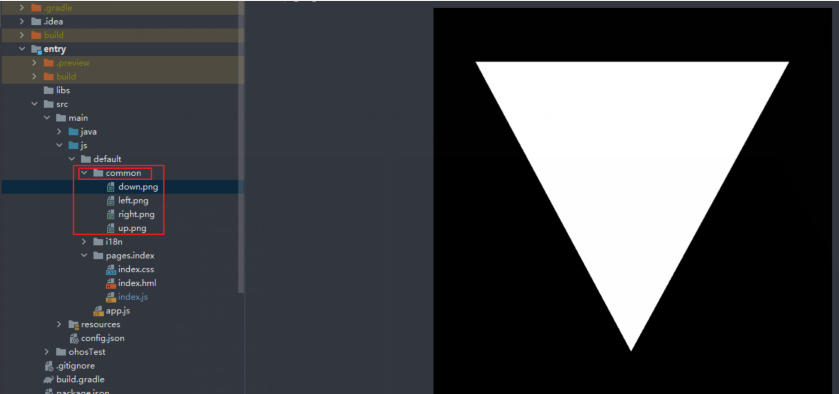
1. 導入圖片資源
在我提供的壓縮資料里找到圖片文件夾,他它們直接copy到項目目錄中。
2. 編寫html頁面
先把標簽、內容和資源定義好,編寫完后運行查看結果:
- <!--容器-->
- <div class="container">
- <!--標題-->
- <text class="title">Snake Game</text>
- <!--畫布組件:貪吃蛇的移動區域-->
- <canvas style="width: 600px; height: 600px; background-color: black;"></canvas>
- <!--上按鍵-->
- <image src="/common/up.png"></image>
- <!--左按鍵-->
- <image src="/common/left.png"></image>
- <!--下按鍵-->
- <image src="/common/down.png"></image>
- <!--右按鍵-->
- <image src="/common/right.png"></image>
- <!--顯示得分-->
- <text>
- <span>Score: </span>
- </text>
- </div>
運行后發現樣式布局混亂,不過沒關系,運行主要是確保樣式和資源有沒有加載。都加載好之后,再調整樣式。
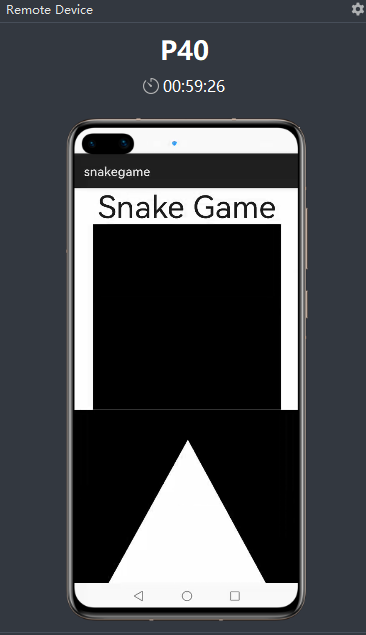
(測試的話,要去最上方導航欄,點擊 Tools>HVD Manager>登陸開發者賬號>選擇P40后面的那個三角形)。

3. 編寫css代碼
調整樣式,在需要調整的樣式后面加對應的類名class="",通過這些類名調用css文件的數據。
- <!--上按鍵-->
- <image class="backBtnup" src="/common/up.png"></image>
- <!--左按鍵-->
- <image class="backBtnleft" src="/common/left.png"></image>
- <!--下按鍵-->
- <image class="backBtncenter" src="/common/down.png"></image>
- <!--右按鍵-->
- <image class="backBtnright" src="/common/right.png"></image>
- <!--顯示得分-->
- <text class="scoretitle">
- <span>Score: </span>
- </text>
確認好類名之后,就在index.css文件中根據類名寫css。
- .container {
- flex-direction: column;
- justify-content: center;
- align-items: center;
- background-color: white;
- }
- .title {
- font-size: 100px;
- margin-bottom: 130px;
- }
- .scoretitle {
- font-size: 50px;
- margin-top: 30px;
- }
- /*
- css選擇器,逗號代表并列關系
- 具體可以百度噢,因為前端博大精深
- */
- .backBtnup, .backBtncenter, .backBtnleft, .backBtnright {
- width: 100px;
- height: 100px;
- margin-bottom: 20px;
- margin-top: 20px;
- border-radius: 10px;
- background-color: black;
- }
- .backBtnup {
- margin-top: 80px;
- }
- .backBtncenter {
- margin-left: 40px;
- margin-right: 40px;
- }
寫好上述內容后,再次運行一下。發現有點樣子了,只需處理一下按鈕即可。
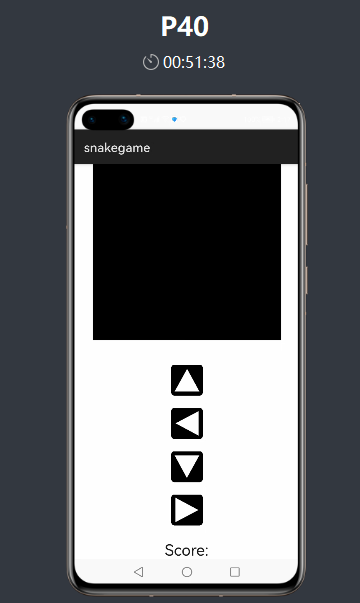
4. 優化按鈕
想要的效果是方向鍵如同鍵盤方向的布局,所以只需對下面三個按鍵進行處理。可以用一個div標簽把它們包裹起來,再定義一個新屬性。
- <!--上按鍵-->
- <image class="backBtnup" src="/common/up.png"></image>
- <!--下面三個按鍵用同一樣式,所以用同一個div包圍-->
- <div class="directsecond">
- <!--左按鍵-->
- <image src="/common/left.png" class="backBtnleft"></image>
- <!--下按鍵-->
- <image src="/common/down.png" class="backBtncenter"></image>
- <!--右按鍵-->
- <image src="/common/right.png" class="backBtnright"></image>
- </div>
css部分的新添加的代碼:
- .directsecond {
- flex-direction: row;
- justify-content: center;
- align-items: center;
- }
運行測試一下,發現達到了我們想要的效果。
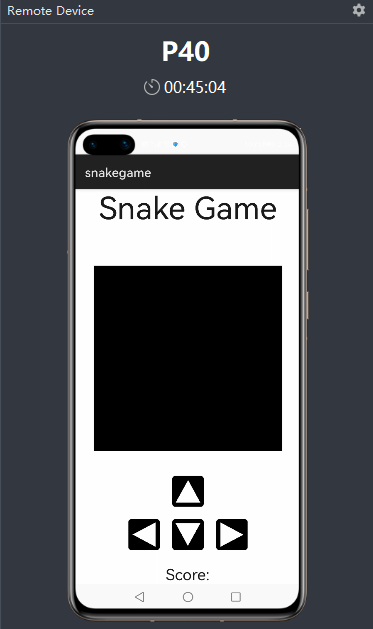
三、編寫JS代碼
我們發現現在只有樣式,光點擊按鈕沒有反饋,而且也沒有小蛇和食物……
所以我們接下來編寫JS代碼就是要解決這些事情,但是切忌邊寫邊想。應該先設計再寫代碼!
1. 設計思想
- 按鈕的觸發是通過點擊屏幕,所以要有點擊事件
鼠標點擊事件是有對應的方法
通過方法傳不同的參數來區別不同的方向
- 食物的生成
隨機生成
判斷食物生成的位置如果出現在蛇身上,則重新生成
- 蛇身的初始化 (由于案例比較簡單,所以沒有設定隨機生成初始位置)
給定長度并設定一個空數組
通過for循環,把x和y的坐標push進數組,作為蛇身每格的位置
- 蛇運動
移動是靠每幀重繪位置
吃到水果就頭部立刻加長
沒吃到水果就去掉尾部,把頭部方向指向的下一個位置記錄到數組頭部,等下次刷新幀
- 判定游戲結束
碰壁
相對方向移動
形成環路
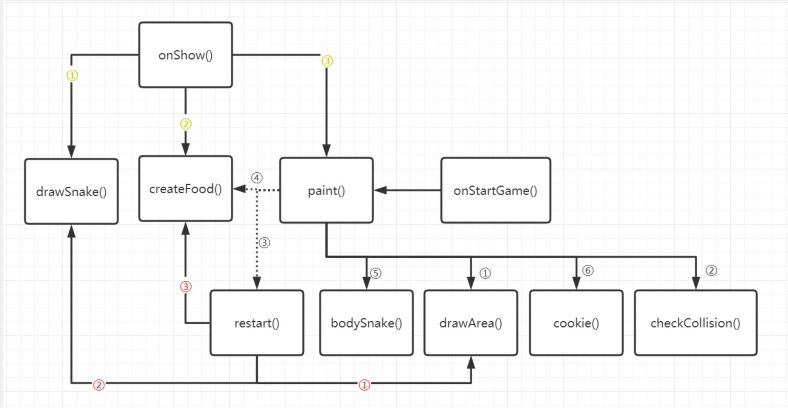
2. 方法調用流程圖
虛線代表 if 判斷,如果為符合判斷條件才會調用該方法。
3. 編寫代碼
在index.html文件中綁定對應的事件(這也是html文件的全部內容)
- <!--容器-->
- <div class="container">
- <!--標題-->
- <text class="title">Snake Game</text>
- <!--畫布組件:貪吃蛇的移動區域-->
- <canvas ref="canvasref" style="width: 600px; height: 600px; background-color: black;"></canvas>
- <!--上按鍵-->
- <image src="/common/up.png" class="backBtnup" onclick="onStartGame(1)"></image>
- <!--下面三個按鍵用同一樣式,所以用同一個div包圍-->
- <div class="directsecond">
- <!--左按鍵-->
- <image src="/common/left.png" class="backBtnleft" onclick="onStartGame(2)"></image>
- <!--下按鍵-->
- <image src="/common/down.png" class="backBtncenter" onclick="onStartGame(3)"></image>
- <!--右按鍵-->
- <image src="/common/right.png" class="backBtnright" onclick="onStartGame(4)"></image>
- </div>
- <!--用if判斷,如果游戲結束,則顯示該模塊-->
- <text if="{{gameOver}}" class="scoretitle">
- <span>Game Over!!!</span>
- </text>
- <!--用if判斷,如果游戲沒有結束,則顯示該模塊。顯示得分-->
- <text if="{{!gameOver}}" class="scoretitle">
- <span>Score: {{score}}</span>
- </text>
- </div>
index.js文件的全部內容
- export default {
- data: {
- title: "",
- snakeSize: 30, // 蛇身格子像素大小
- w: 600, // 背景的寬度
- h: 600, // 背景的高度
- score: 0, // 得分為0
- snake : [], // 數組用來存蛇每個格子的位置
- ctx: null, // 用來調用填充顏色的
- food: null, // 食物位置
- direction: '', // 按鍵的狀態
- gameOver: false, // 游戲狀態
- tail: { // 記錄更新后蛇頭的位置
- x: 0,
- y: 0
- },
- interval : null // 獲得setInterval()的返回值
- },
- onInit() {
- this.title = this.$t('strings.world');
- },
- onShow() {
- // 通過$refs得到組件,進而調用組件的變量和方法
- const canvas = this.$refs.canvasref;
- // 指定了二維繪畫
- this.ctx = canvas.getContext("2d");
- // 第一次打開app時,初始化蛇的方向
- this.direction = 'down';
- // 調用初始化蛇體的方法
- this.drawSnake()
- // 創建食物的位置
- this.createFood()
- // 渲染幀畫面
- this.paint()
- },
- // 畫背景
- drawArea() {
- var ctx = this.ctx
- // 設置填充顏色的
- ctx.fillStyle = '#61c7e6';
- // 填充
- ctx.fillRect(0, 0, this.w, this.h);
- // 設置矩陣顏色的
- ctx.strokeStyle = '#00000';
- // 矩陣的線寬
- ctx.lineWidth = 5;
- // 繪制矩陣(不填色的)
- ctx.strokeRect(0, 0, this.w, this.h);
- this.ctx = ctx
- },
- // 創建蛇體
- drawSnake() {
- var len = 7;
- var snake = [];
- // 默認蛇的長度為7
- for (var i = len - 1; i >= 0; i--) {
- // 將x軸和y軸的坐標數據存到數組中,這些數據就是每個蛇格子的位置
- snake.push({
- x: 0,
- y: i
- });
- }
- // 更新蛇的長度
- this.snake = snake;
- },
- // 設計蛇身的顏色的
- bodySnake(x, y) {
- //single square of snake
- var ctx = this.ctx;
- // 蛇的顏色及填充的位置和大小
- ctx.fillStyle = '#e28743';
- // fillRect()指的是要填充的位置及大小 參數說明:fillRect(X軸位置, Y軸位置, 寬度, 高度)
- ctx.fillRect(x * this.snakeSize, y * this.snakeSize, this.snakeSize, this.snakeSize);
- // 蛇的內部格子邊框顏色,加了才會分割
- ctx.strokeStyle = '#063970';
- ctx.strokeRect(x * this.snakeSize, y * this.snakeSize, this.snakeSize, this.snakeSize);
- this.ctx = ctx;
- },
- // 設計食物的顏色的
- cookie(x, y) {
- var ctx = this.ctx;
- // 食物的顏色及填充位置和大小
- ctx.fillStyle = '#e2d743';
- ctx.fillRect(x * this.snakeSize, y * this.snakeSize, this.snakeSize, this.snakeSize);
- this.ctx = ctx;
- },
- // 創建食物的位置
- createFood() {
- // 隨機生成食物的位置
- // 這里的20是背景高度(寬度)/ 格子高度(寬度),即 600 / 30 = 20
- this.food = {
- x: Math.floor((Math.random() * 20) + 1),
- y: Math.floor((Math.random() * 20) + 1)
- }
- for (var i = 0; i > this.snake.length; i++) {
- // 獲取剛創建蛇的時候,蛇上每個點的位置,再和食物的位置進行比較
- var snakeX = this.snake[i].x;
- var snakeY = this.snake[i].y;
- // 如果食物的位置出現在蛇的身上,則重新生成
- if (this.food.x === snakeX && this.food.y === snakeY || this.food.y === snakeY && this.food.x === snakeX) {
- this.food.x = Math.floor((Math.random() * 20) + 1);
- this.food.y = Math.floor((Math.random() * 20) + 1);
- }
- }
- },
- // 檢查是否碰壁
- checkCollision(x, y, array) {
- for(var i = 0; i < array.length; i++) {
- if(array[i].x === x && array[i].y === y)
- return true;
- }
- return false;
- },
- // 鼠標點擊綁定的事件
- onStartGame(direct){
- // 設置游戲初始狀態,控制text標簽的顯示
- this.gameOver = false
- // 通過對應的參數,獲取對應direct的字段
- if (direct == 1) {
- this.direction = 'up'
- } else if (direct == 2) {
- this.direction = 'left'
- } else if (direct == 3) {
- this.direction = 'down'
- } else if (direct == 4) {
- this.direction = 'right'
- }
- // 調用繪圖方法
- this.paint()
- // 設置蛇的移動間隔時間,也可以理解為繪圖的時間間隔
- if (this.interval == null) {
- // setInterval() 方法可按照指定的周期(以毫秒計)來調用函數或計算表達式
- this.interval = setInterval(this.paint, 250);
- }
- },
- // 每次移動刷新的操作,即幀畫面創建和渲染的流程
- paint() {
- // 調用畫背景
- this.drawArea()
- // 獲得蛇頭的位置的初始坐標
- var snakeX = this.snake[0].x;
- var snakeY = this.snake[0].y;
- // 移動操作,更新數據
- if (this.direction == 'right') {
- snakeX++;
- }
- else if (this.direction == 'left') {
- snakeX--;
- }
- else if (this.direction == 'up') {
- snakeY--;
- } else if (this.direction == 'down') {
- snakeY++;
- }
- // 反向移動或碰撞壁的時候,游戲失敗,重啟游戲
- if (snakeX == -1 || snakeX == this.w / this.snakeSize || snakeY == -1 || snakeY == this.h / this.snakeSize || this.checkCollision(snakeX, snakeY, this.snake)) {
- //ctx.clearRect(0,0,this.w,this.h); //clean up the canvas
- clearInterval(this.interval);
- this.interval = null
- this.restart()
- return;
- }
- // 判斷是否吃到食物
- if(snakeX == this.food.x && snakeY == this.food.y) {
- // 吃到食物
- // 將食物的位置記錄下來
- this.tail = {x: snakeX, y: snakeY};
- // 分數加5
- this.score = this.score+5;
- // 再創建食物
- this.createFood();
- } else {
- // 沒吃到食物
- // 去掉數組最后的元素并返回,相當于刪除蛇尾
- this.tail = this.snake.pop();
- // 將移動更新后蛇頭的位置加到tail中
- this.tail.x = snakeX;
- this.tail.y = snakeY;
- }
- // unshift()方法可向數組的開頭添加一個或多個元素
- // 將更新后的節點添加蛇頭
- this.snake.unshift(this.tail);
- // 渲染每個蛇身格子的位置
- for(var i = 0; i < this.snake.length; i++) {
- this.bodySnake(this.snake[i].x, this.snake[i].y);
- }
- // 渲染食物的位置
- this.cookie(this.food.x, this.food.y);
- },
- // 重啟操作
- restart() {
- this.drawArea()
- this.drawSnake()
- this.createFood()
- this.gameOver = true
- this.score = 0
- },
- }
運行測試ok。
寫貼方式有點虎頭蛇尾,在比較重要的JS代碼部分沒有細致說清步驟。不過這也是沒辦法的,因為這里面太多嵌套調用了,只有文字無法說清,唯有視頻講解才能把邏輯理清。所以考慮到這樣的缺點,我也做出了程序調用流程圖來方便大家理解。就好像很難用語言去描述遞歸的調用流程一樣,因為這是套娃……
在我看來這個小項目還是有比較多改進的地方
比如:
- 蛇的位置隨機生成;
- 優化按下相對按鍵的操作:即蛇向右走的時候,按左方向是不會影響蛇的方向,就不會被程序判定失敗了;
- 定制專門的重啟游戲按鍵
- 等等
引用
4-1.生態案例:【開發者說】重塑經典,如何在HarmonyOS手機上還原貪吃蛇游戲.pdf
HarmonyOS開發者 / 重塑經典,如何在HarmonyOS手機上還原貪吃蛇游戲
PS:友情提示
# 圖片模糊怎么辦?
對圖片右鍵在新窗口打開
對圖片右鍵另存為本地看
# 下面有兩個文件
【鴻蒙——貪吃蛇項目源碼.rar】是項目源碼
【4-1.生態案例:【開發者說】重塑經典,如何.pdf】是官方大禮包的原文件
文章相關附件可以點擊下面的原文鏈接前往下載
原文鏈接:https://harmonyos.51cto.com/posts/4776