20 分鐘建立一個 Ansible 實驗室
建立一個支持學習和實驗新軟件的環境。
能夠構建和拆解公有云環境是非常有用的,但我們大多數人都不能輕松訪問公有云。退而求其次的最好辦法就是在本地機器上建立一個實驗室,但即使在本地機器上運行也會帶來性能、靈活性和其他挑戰。大多數時候,本地機器上額外的工作負載會干擾我們日常的工作,它們當然也會影響你提供一個現成的環境來玩耍和實驗新軟件。
幾年前,當我和我的團隊開始學習 Ansible 時,我們就遇到了這個挑戰。我們找不到一個可以單獨使用的環境,我們對這種情況的失望導致我們中的一些人停止了實驗。我們知道需要找到一個解決方案。
我們花了很多時間研究各種方案,得出了一套工具,使我們的好奇心能夠在我們完全控制的環境中學習。我們可以在本地機器上輪換和拆解實驗室環境,而不需要訪問內部實驗室或公共云。
本文將解釋如何在 20 分鐘內以完全自動化的方式在本地機器上部署自己的實驗室環境。
你可以在我的 GitHub 倉庫中找到這個練習的所有代碼。
工具和軟件
本方案使用以下工具和軟件:
- Ansible 是我們選擇的自動化工具,因為它易于使用,而且足夠靈活,可以滿足實驗室的要求。
- Vagrant 易于使用,用于構建和維護虛擬機。
- VirtualBox 是一個托管管理程序,可以在 Windows 和 Linux 環境中使用。
- Fedora v30+ 是我本地機器上的操作系統。
你必須進行以下設置才能建立環境:
- 一個互聯網連接
- 在 BIOS 中啟用虛擬化技術支持(以下是在我的聯想筆記本上的過程)
- Vagrant v2.2.9
- 最新版本的 Ansible
- 最新版本的 VirtualBox
- Fedora v30+ 宿主機操作系統
這個實驗室環境有什么?
這個項目旨在部署一個帶有 Ansible 引擎和多個 Linux 節點的 Ansible 主機,以及一些預加載和預配置的應用程序(httpd 和 MySQL)。它還啟用了 Cockpit,這樣你就可以在測試過程中監控虛擬機(VM)的狀態。使用預部署的應用程序的原因是為了提高效率(所以你不必花時間安裝這些組件)。這樣你就可以專注于創建角色和劇本,并針對上述工具部署的環境進行測試。
我們確定,對于我們的用例來說,最好的方案是多機 Vagrant 環境。Vagrant 文件創建了三個 CentOS 虛擬機,以模擬兩個目標主機和一個 Ansible 控制機。
- Host1: 沒有圖形用戶界面(GUI),安裝 httpd 和 MySQL
- Host2: 沒有 GUI,安裝了 httpd 和 MySQL
- Ansible-host:沒有 GUI,安裝了 Ansible 引擎
啟用多個管理程序
如果使用了多個管理程序,一些管理程序可能不允許你拉起虛擬機。要解決這個問題,請遵循以下步驟(基于 Vagrant 的安裝說明)。
首先,找出管理程序的名稱:
$ lsmod | grep kvmkvm_intel 204800 6kvm 593920 1 kvm_intelirqbypass 16384 1 kvm
我感興趣的是 kvm_intel,但你可能需要另一個(比如 kvm_amd)。
以 root 身份運行以下內容,將該管理程序列入黑名單:
$ echo 'blacklist kvm-intel' >> /etc/modprobe.d/blacklist.conf
重新啟動你的機器并嘗試再次運行 Vagrant。
Vagrant 文件
cat Vagrantfile
# -*- mode: ruby -*-# vi: set ft=ruby :Vagrant.configure("2") do |config|# Define VMs with static private IP addresses, vcpu, memory and vagrant-box.boxes = [{:name => "web1.demo.com", ⇒ Host1 this is one of the target nodes:box => "centos/8", ⇒ OS version:ram => 1024, ⇒ Allocated memory:vcpu => 1, ⇒ Allocated CPU:ip => "192.168.29.2" ⇒ Allocated IP address of the node},{:name => "web2.demo.com", ⇒ Host2 this is one of the target nodes:box => "centos/8",:ram => 1024,:vcpu => 1,:ip => "192.168.29.3"},{:name => "ansible-host", ⇒ Ansible Host with Ansible Engine:box => "centos/8",:ram => 8048,:vcpu => 1,:ip => "192.168.29.4"}]# Provision each of the VMs.boxes.each do |opts|config.vm.define opts[:name] do |config|# Only Enable this if you are connecting to Proxy server# config.proxy.http = "http://usernam:password@x.y:80"⇒ Needed if you have a proxy# config.proxy.https = "http://usernam:password@x.y:80"# config.proxy.no_proxy = "localhost,127.0.0.1"config.vm.synced_folder ".", "/vagrant", id: "vagrant-root", disabled: trueconfig.ssh.insert_key = falseconfig.vm.box = opts[:box]config.vm.hostname = opts[:name]config.vm.provider :virtualbox do |v| ⇒ Defines the vagrant providerv.memory = opts[:ram]v.cpus = opts[:vcpu]endconfig.vm.network :private_network, ip: opts[:ip]config.vm.provision :file do |file|file.source = './keys/vagrant' ⇒ vagrant keys to allow access to the nodesfile.destination = '/tmp/vagrant' ⇒ the location to copy the vagrant keyendconfig.vm.provision :shell, path: "bootstrap-node.sh" ⇒ script that copy hosts entryconfig.vm.provision :ansible do |ansible| ⇒ declaration to run ansible playbookansible.verbose = "v"ansible.playbook = "playbook.yml" ⇒ the playbook used to configure the hostsendendendend
這些是你需要注意的重要文件。
inventory-test.yaml:連接到節點的清單文件playbook.yaml:Vagrant 供應者調用的用于配置節點的劇本文件- `Vagrantfile':Vagrant 用來部署環境的文件
- Vagrant 密鑰文件:連接實驗室環境中各節點的 Vagrant 密鑰
你可以根據你的需要調整這些文件。Ansible 的靈活性使你有能力根據你的需要聲明性地改變你的環境。
部署你的實驗室環境
首先,克隆這個 GitHub 倉庫 中的代碼:
$ git clone https://github.com/mikecali/ansible-labs-101.gitCloning into 'ansible-labs-101'...remote: Enumerating objects: 15, done.remote: Counting objects: 100% (15/15), done.remote: Compressing objects: 100% (13/13), done.remote: Total 15 (delta 2), reused 10 (delta 0), pack-reused 0Unpacking objects: 100% (15/15), 6.82 KiB | 634.00 KiB/s, done.
接下來,將你的目錄改為 vagrant-session-2,并查看其內容:
$ lsBootstrap-node.sh inventory keys playbook.yml README.md Vagrantfile
現在你已經擁有了實驗室環境所需的所有工件和配置文件。要部署環境,請運行:
$ vagrant up
只要有一個像樣的網絡連接,只需要 20 分鐘左右就可以得到一個運行環境:
$ vagrant upBringing machine 'web1.demo.com' up with 'virtualbox' provider...Bringing machine 'web2.demo.com' up with 'virtualbox' provider...Bringing machine 'ansible-host' up with 'virtualbox' provider...==> web1.demo.com: Importing base box 'centos/8'...==> web1.demo.com: Matching MAC address for NAT networking...==> web1.demo.com: Checking if box 'centos/8' version '1905.1' is up to date...==> web1.demo.com: Setting the name of the VM: ansible-labs_web1democom_1606434176593_70913==> web1.demo.com: Clearing any previously set network interfaces...==> web1.demo.com: Preparing network interfaces based on configuration...web1.demo.com: Adapter 1: natweb1.demo.com: Adapter 2: hostonly==> web1.demo.com: Forwarding ports...web1.demo.com: 22 (guest) => 2222 (host) (adapter 1)==> web1.demo.com: Running 'pre-boot' VM customizations...==> web1.demo.com: Booting VM...==> web1.demo.com: Waiting for machine to boot. This may take a few minutes...web1.demo.com: SSH address: 127.0.0.1:2222web1.demo.com: SSH username: vagrantweb1.demo.com: SSH auth method: private key[...]
一旦該劇本執行完成,你會看到這樣的輸出:
PLAY RECAP *********************************Ansible-host : ok=20 changed=11 unreachable=0 failed=0 skipped=0 rescued=0 ignored=3Real 18m14.288sUser 2m26.978sSys 0m26.849s
確認所有虛擬機都在運行:
$ vagrant statusCurrent machine states:Web1.demo.com running (virtualbox)Web2.demo.com running (virtualbox)ansible-host running (virtualbox)[...]
你可以通過登錄其中一個虛擬機進一步調查。訪問 ansible-host:
> vagrant ssh ansible-hostActivate the web console with: systemctl enable --now cockpit.socketLast login: Thu Nov 26 12:21:23 2020 from 10.0.2.2[vagrant@ansible-host ~] uptime16:46:42 up 1:24, 1 user, load average: 0.00, 0.01, 0.04
最后,你可以使用 Ansible 模塊來 ping 你創建的其他節點:
[vagrant@ansible-host]$ ansible -i inventory-test.yaml \webservers -m ping -u vagrant192.168.29.2 | SUCCESS => {"Ansible-facts": {"Discovered_interpreter_python": "/usr/libexec/platform-python"},"Changed": false;"Ping": "pong"}[...]
清理
運行如下命令來清理環境:
$ vagrant destroy [vagrant machine name]
你的輸出會像這樣:
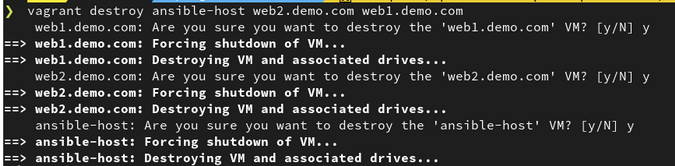
Output from cleaning up environment
有創意的學習
在自己的實驗室里利用自己的時間學習 Ansible 這樣的軟件是一個好習慣,但由于受到無法控制的限制,可能會很困難。
有時候,你需要發揮創意,找到另一種方法。在開源社區中,你可以選擇很多方案;我們選擇這些工具的主要原因之一是,它們是許多人常用和熟悉的。
另外,請注意,這些劇本并沒有按照我的要求進行優化。