圖像風格遷移也有框架了:使用Python編寫,與PyTorch完美兼容,外行也能用
易于使用的神經風格遷移框架 pystiche。
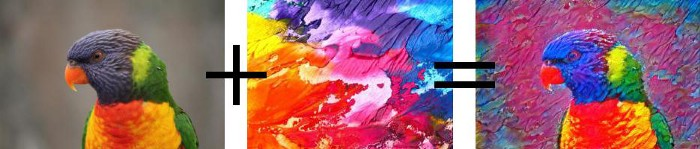
將內容圖片與藝術風格圖片進行融合,生成一張具有特定風格的新圖,這種想法并不新鮮。早在 2015 年,Gatys、 Ecker 以及 Bethge 開創性地提出了神經風格遷移(Neural Style Transfer ,NST)。
不同于深度學習,目前 NST 還沒有現成的庫或框架。因此,新的 NST 技術要么從頭開始實現所有內容,要么基于現有的方法實現。但這兩種方法都有各自的缺點:前者由于可重用部分的冗長實現,限制了技術創新;后者繼承了 DL 硬件和軟件快速發展導致的技術債務。
最近,新項目 pystiche 很好地解決了這些問題,雖然它的核心受眾是研究人員,但其易于使用的用戶界面為非專業人員使用 NST 提供了可能。
pystiche 是一個用 Python 編寫的 NST 框架,基于 PyTorch 構建,并與之完全兼容。相關研究由 pyOpenSci 進行同行評審,并發表在 JOSS 期刊 (Journal of Open Source Software) 上。
論文地址:https://joss.theoj.org/papers/10.21105/joss.02761
項目地址:https://github.com/pmeier/pystiche
在深入實現之前,我們先來回顧一下 NST 的原理。它有兩種優化方式:基于圖像的優化和基于模型的優化。雖然 pystiche 能夠很好地處理后者,但更為復雜,因此本文只討論基于圖像的優化方法。
在基于圖像的方法中,將圖像的像素迭代調整訓練,來擬合感知損失函數(perceptual loss)。感知損失是 NST 的核心部分,分為內容損失(content loss)和風格損失(style loss),這些損失評估輸出圖像與目標圖像的匹配程度。與傳統的風格遷移算法不同,感知損失包含一個稱為編碼器的多層模型,這就是 pystiche 基于 PyTorch 構建的原因。
如何使用 pystiche
讓我們用一個例子介紹怎么使用 pystiche 生成神經風格遷移圖片。首先導入所需模塊,選擇處理設備。雖然 pystiche 的設計與設備無關,但使用 GPU 可以將 NST 的速度提高幾個數量級。
模塊導入與設備選擇:
- import torch
- import pystiche
- from pystiche import demo, enc, loss, ops, optim
- print(f"pystiche=={pystiche.__version__}")
- device = torch.device("cuda" if torch.cuda.is_available() else "cpu")
輸出:
- pystiche==0.7.0
多層編碼器
content_loss 和 style_loss 是對圖像編碼進行操作而不是圖像本身,這些編碼是由在不同層級的預訓練編碼器生成的。pystiche 定義了 enc.MultiLayerEncoder 類,該類在單個前向傳遞中可以有效地處理編碼問題。該示例使用基于 VGG19 架構的 vgg19_multi_layer_encoder。默認情況下,它將加載 torchvision 提供的權重。
多層編碼器:
- multi_layer_encoder = enc.vgg19_multi_layer_encoder()
- print(multi_layer_encoder)
輸出:
- VGGMultiLayerEncoder(
- arch=vgg19, framework=torch, allow_inplace=True
- (preprocessing): TorchPreprocessing(
- (0): Normalize(
- mean=('0.485', '0.456', '0.406'),
- std=('0.229', '0.224', '0.225')
- )
- )
- (conv1_1): Conv2d(3, 64, kernel_size=(3, 3), stride=(1, 1), padding=(1, 1))
- (relu1_1): ReLU(inplace=True)
- (conv1_2): Conv2d(64, 64, kernel_size=(3, 3), stride=(1, 1), padding=(1, 1))
- (relu1_2): ReLU(inplace=True)
- (pool1): MaxPool2d(kernel_size=2, stride=2, padding=0, dilation=1, ceil_mode=False)
- (conv2_1): Conv2d(64, 128, kernel_size=(3, 3), stride=(1, 1), padding=(1, 1))
- (relu2_1): ReLU(inplace=True)
- (conv2_2): Conv2d(128, 128, kernel_size=(3, 3), stride=(1, 1), padding=(1, 1))
- (relu2_2): ReLU(inplace=True)
- (pool2): MaxPool2d(kernel_size=2, stride=2, padding=0, dilation=1, ceil_mode=False)
- (conv3_1): Conv2d(128, 256, kernel_size=(3, 3), stride=(1, 1), padding=(1, 1))
- (relu3_1): ReLU(inplace=True)
- (conv3_2): Conv2d(256, 256, kernel_size=(3, 3), stride=(1, 1), padding=(1, 1))
- (relu3_2): ReLU(inplace=True)
- (conv3_3): Conv2d(256, 256, kernel_size=(3, 3), stride=(1, 1), padding=(1, 1))
- (relu3_3): ReLU(inplace=True)
- (conv3_4): Conv2d(256, 256, kernel_size=(3, 3), stride=(1, 1), padding=(1, 1))
- (relu3_4): ReLU(inplace=True)
- (pool3): MaxPool2d(kernel_size=2, stride=2, padding=0, dilation=1, ceil_mode=False)
- (conv4_1): Conv2d(256, 512, kernel_size=(3, 3), stride=(1, 1), padding=(1, 1))
- (relu4_1): ReLU(inplace=True)
- (conv4_2): Conv2d(512, 512, kernel_size=(3, 3), stride=(1, 1), padding=(1, 1))
- (relu4_2): ReLU(inplace=True)
- (conv4_3): Conv2d(512, 512, kernel_size=(3, 3), stride=(1, 1), padding=(1, 1))
- (relu4_3): ReLU(inplace=True)
- (conv4_4): Conv2d(512, 512, kernel_size=(3, 3), stride=(1, 1), padding=(1, 1))
- (relu4_4): ReLU(inplace=True)
- (pool4): MaxPool2d(kernel_size=2, stride=2, padding=0, dilation=1, ceil_mode=False)
- (conv5_1): Conv2d(512, 512, kernel_size=(3, 3), stride=(1, 1), padding=(1, 1))
- (relu5_1): ReLU(inplace=True)
- (conv5_2): Conv2d(512, 512, kernel_size=(3, 3), stride=(1, 1), padding=(1, 1))
- (relu5_2): ReLU(inplace=True)
- (conv5_3): Conv2d(512, 512, kernel_size=(3, 3), stride=(1, 1), padding=(1, 1))
- (relu5_3): ReLU(inplace=True)
- (conv5_4): Conv2d(512, 512, kernel_size=(3, 3), stride=(1, 1), padding=(1, 1))
- (relu5_4): ReLU(inplace=True)
- (pool5): MaxPool2d(kernel_size=2, stride=2, padding=0, dilation=1, ceil_mode=False)
- )
感知損失
pystiche 將內容損失和風格損失定義為操作符。使用 ops.FeatureReconstructionOperator 作為 content_loss,直接與編碼進行對比。如果編碼器針對分類任務進行過訓練,如該示例中這些編碼表示內容。對于content_layer,選擇 multi_layer_encoder 的較深層來獲取抽象的內容表示,而不是許多不必要的細節。
- content_layer = "relu4_2"
- encoder = multi_layer_encoder.extract_encoder(content_layer)
- content_loss = ops.FeatureReconstructionOperator(encoder)
pystiche 使用 ops.GramOperator 作為 style_loss 的基礎,通過比較編碼各個通道之間的相關性來丟棄空間信息。這樣就可以在輸出圖像中的任意區域合成風格元素,而不僅僅是風格圖像中它們所在的位置。對于 ops.GramOperator,如果它在淺層和深層 style_layers 都能很好地運行,則其性能達到最佳。
style_weight 可以控制模型對輸出圖像的重點——內容或風格。為了方便起見,pystiche 將所有內容包裝在 ops.MultiLayerEncodingOperator 中,該操作處理在同一 multi_layer_encoder 的多個層上進行操作的相同類型操作符的情況。
- style_layers = ("relu1_1", "relu2_1", "relu3_1", "relu4_1", "relu5_1")
- style_weight = 1e3
- def get_encoding_op(encoder, layer_weight):
- return ops.GramOperator(encoder, score_weight=layer_weight)
- style_loss = ops.MultiLayerEncodingOperator(
- multi_layer_encoder, style_layers, get_encoding_op, score_weight=style_weight,
- )
loss.PerceptualLoss 結合了 content_loss 與 style_loss,將作為優化的標準。
- criterion = loss.PerceptualLoss(content_loss, style_loss).to(device)
- print(criterion)
輸出:
- PerceptualLoss(
- (content_loss): FeatureReconstructionOperator(
- score_weight=1,
- encoder=VGGMultiLayerEncoder(
- layer=relu4_2,
- arch=vgg19,
- framework=torch,
- allow_inplace=True
- )
- )
- (style_loss): MultiLayerEncodingOperator(
- encoder=VGGMultiLayerEncoder(
- arch=vgg19,
- framework=torch,
- allow_inplace=True
- ),
- score_weight=1000
- (relu1_1): GramOperator(score_weight=0.2)
- (relu2_1): GramOperator(score_weight=0.2)
- (relu3_1): GramOperator(score_weight=0.2)
- (relu4_1): GramOperator(score_weight=0.2)
- (relu5_1): GramOperator(score_weight=0.2)
- )
- )
圖像加載
首先加載并顯在 NST 需要的目標圖片。因為 NST 占用內存較多,故將圖像大小調整為 500 像素。
- size = 500
- images = demo.images()
- content_image = images["bird1"].read(sizesize=size, devicedevice=device)
- criterion.set_content_image(content_image)
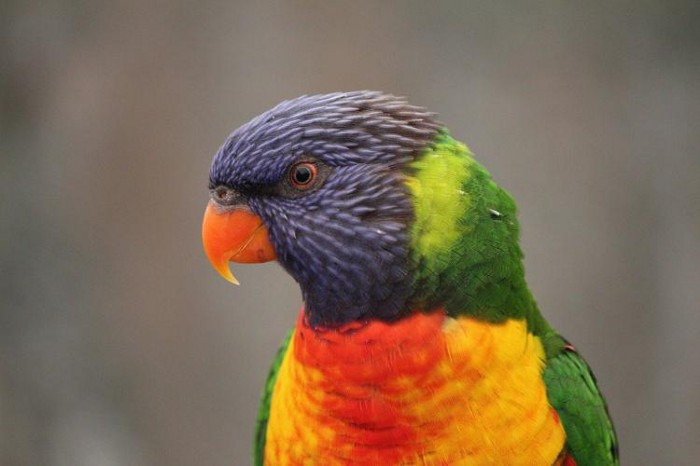
內容圖片
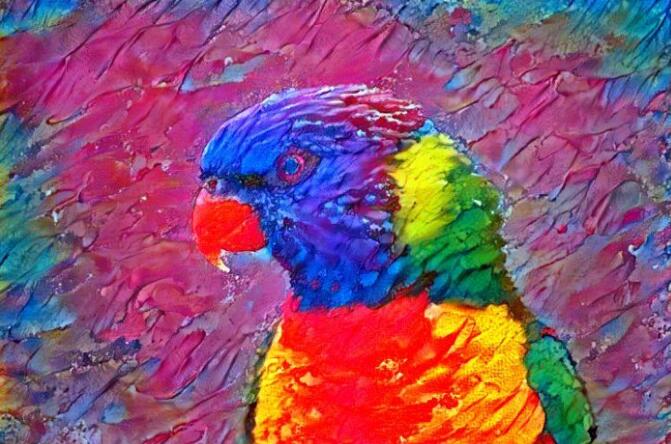
- style_image = images["paint"].read(sizesize=size, devicedevice=device)
- criterion.set_style_image(style_image)

風格圖片
神經風格遷移
創建 input_image。從 content_image 開始執行 NST,這樣可以實現快速收斂。image_optimization 函數是為了方便,也可以由手動優化循環代替,且不受限制。如果沒有指定,則使用 torch.optim.LBFGS 作為優化器。
- input_image = content_image.clone()
- output_image = optim.image_optimization(input_image, criterion, num_steps=500)
【本文是51CTO專欄機構“機器之心”的原創譯文,微信公眾號“機器之心( id: almosthuman2014)”】